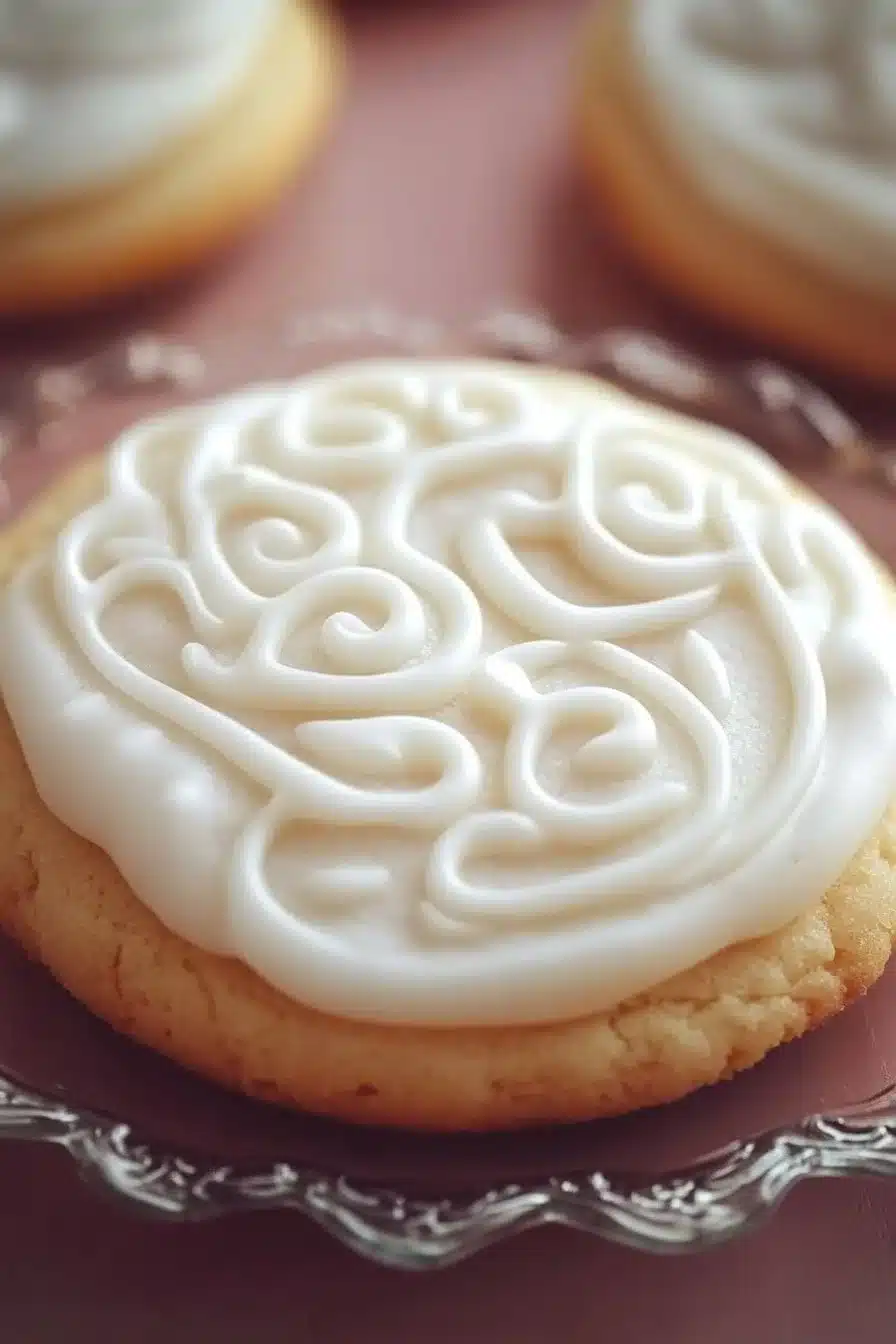
The first time I iced sugar cookies with this simple glaze, my little one pressed his flour-dusted nose to the jar and sighed like it was the first snowfall he had ever seen. The smell of warm vanilla folded with sweet powdered sugar filled the kitchen, and for a few quiet minutes the whole house felt wrapped in a soft, familiar comfort. I remember the laugh, the small sticky hand, and the way the afternoon light made every cookie sparkle a little more. That is the heart of Classic Sugar Cookie Icing for me: small moments made sweeter, one cookie at a time.
Why This Classic Sugar Cookie Icing Means So Much
There is a kind of memory that lives in the smell of the things we make. For me, Classic Sugar Cookie Icing carries the scent of Saturdays when the calendar was empty and the kitchen table held half a dozen stories besides the cookies. It means listening to the radio while I sift sugar, watching the kids chase each other through the warm glow from the oven, and trading quiet, proud smiles with my partner as we plate another batch. Those small, ordinary rituals built a language of comfort in our home.
This icing is not flashy. It is gentle, honest, and forgiving. It forgives a rushed mixing bowl and a slightly uneven cookie edge. It lets you practice piping lines and learning to spread with a butter knife without making a fuss. Because of that calmness, this icing becomes part of the way we celebrate simple victories: a scraped knee bandaged, a test passed, or a neighbor stopping by with a smile. Those moments are the true decorations.
There is also an ease to this recipe that invites company. I have stood with friends in my kitchen who were convinced they could not bake a thing, and by the time we had sifted and stirred, they were surprised at how satisfying it felt. The icing is the kind of recipe that hands itself readily to helpers. Little fingers can dip a spoon. Older cousins can practice lining up sprinkles. It turns baking from a solo task into a shared afternoon and that is the kind of warmth I hope to give anyone who reads this.
When the holidays come, this glaze becomes a quiet backbone to whatever cookies we make. It is the part that lets kids add their fingerprints and thoughtful notes for grandparents. It takes on color from holiday tins and cocoa from a mug at the side of the tray. It carries the stories we layer onto it and then, sometime later, it carries the crumbs and the memories when there is nothing left but an empty plate and a warm sink.
Print
Classic Sugar Cookie Icing
- Total Time: 10 minutes
- Yield: 12 servings 1x
- Diet: Vegetarian
Description
A simple and forgiving icing for sugar cookies, perfect for creating delightful decorations and memories.
Ingredients
- 2 cups powdered sugar
- 2 tablespoons milk
- 1 teaspoon vanilla extract
- Food coloring (optional)
Instructions
- In a mixing bowl, combine powdered sugar, milk, and vanilla extract. Stir until the ingredients begin to come together, watching for any lumps to soften and dissolve.
- Stir until smooth and well blended. Keep stirring until the surface looks glossy and a ribbon forms when you lift the spoon.
- If desired, add food coloring to achieve the desired hue. Add it sparingly, a little at a time, and stir slowly so the color spreads evenly.
- Use immediately to frost sugar cookies, allowing the icing to harden before storing.
Notes
For best results, sift powdered sugar before mixing. Adjust milk for desired thickness.
- Prep Time: 10 minutes
- Cook Time: 0 minutes
- Category: Dessert
- Method: Mixing
- Cuisine: American
Nutrition
- Serving Size: 1 serving
- Calories: 120
- Sugar: 28g
- Sodium: 10mg
- Fat: 0g
- Saturated Fat: 0g
- Unsaturated Fat: 0g
- Trans Fat: 0g
- Carbohydrates: 30g
- Fiber: 0g
- Protein: 0g
- Cholesterol: 0mg
How to Make Classic Sugar Cookie Icing
“Every time I stir this pot, it smells just like Sunday at home.”
Making this icing has a rhythm that is almost like a small conversation with your kitchen. First you gather the few simple things you need and feel the quiet pleasure of a countertop cleared and ready. Then you begin to stir. The powdered sugar clouds up and starts to smooth, the vanilla lifts the scent, and the milk brings everything together in a glossy ribbon that catches the light. That first swirl is always a little magic.
As you stir, listen for the tiny sounds: the soft scrape of a wooden spoon, the whisper of sugar settling, the faint bubble when the glaze is just the right consistency. It tells you things. If it is clumpy, it needs a touch more milk. If it runs too freely, a little more powdered sugar will quiet it down. Those adjustments are gentle nudges rather than rules. Trust your hands and your eyes.
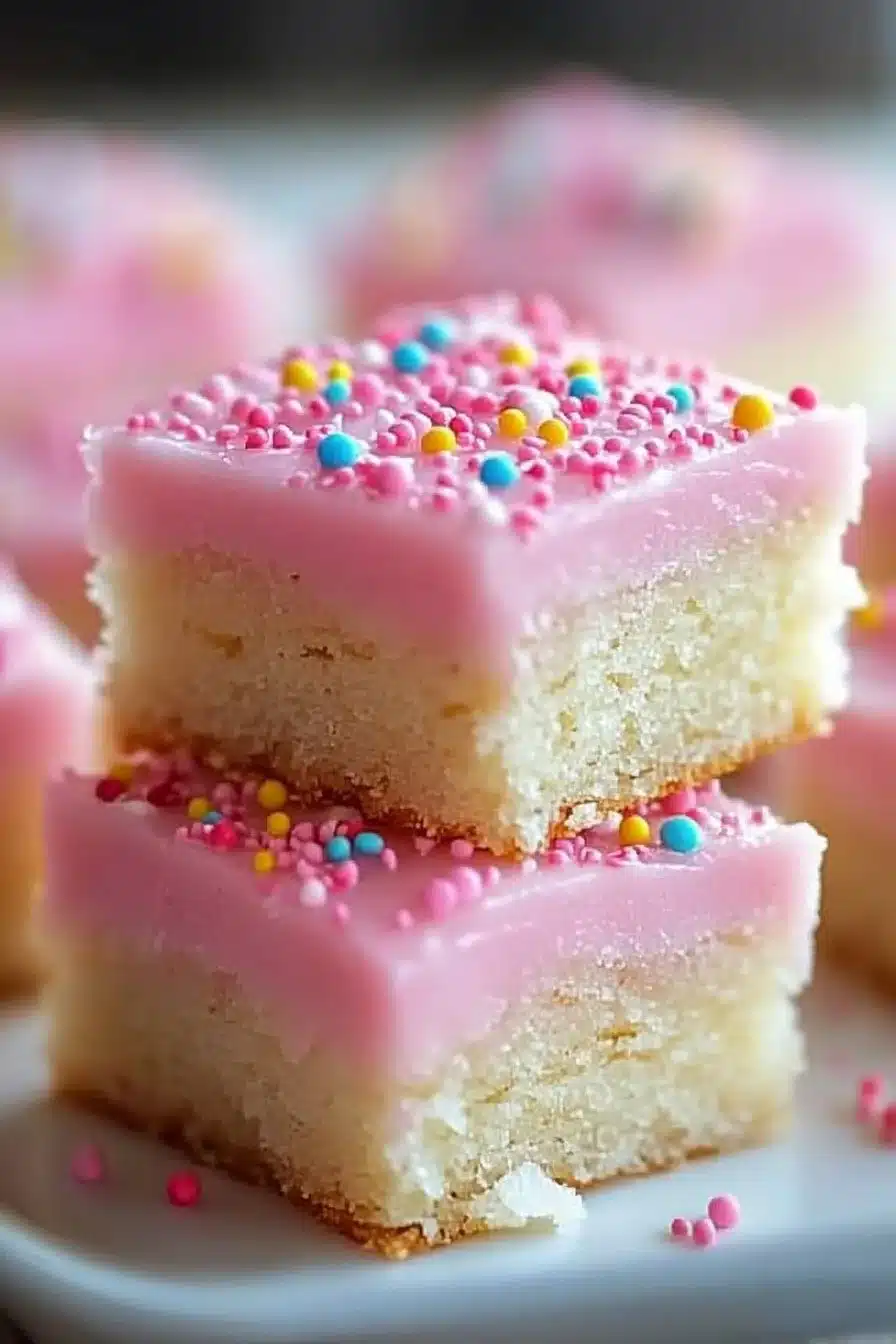
Coloring the icing is where we let ourselves have a little fun. A drop or two of food coloring changes the mood of the cookies. Pastels feel like a calm afternoon. Bright colors make the kitchen feel like a party. Stir slowly as you add color, because the shade deepens as it rests. Sometimes I let the glaze sit for a minute and then return, noticing how light refracts through the surface and planning where to drizzle, where to coat, and where to dot.
Finally, spread or pipe with a relaxed hand. This icing sets to a delicate, slightly glossy finish that holds small decorations but still tastes soft in the mouth. The texture is familiar and comforting: not crunchy like royal icing, not too slick, but a happy middle that lets the cookie feel like a blanket. It is the sort of finish that lets people admire the cookies before they are eaten and that allows you to stack a few for a neighbor without cracking or smudging.
Ingredients You’ll Need
2 cups powdered sugar
2 tablespoons milk
1 teaspoon vanilla extract
Food coloring (optional)
A little side note about the pantry items: I always keep an extra cup of powdered sugar tucked away for quick fixes. If you love a cozy aroma, add a little extra vanilla. If your butter is fresh and sweet, that richness will carry through even when this icing is simple. For food coloring, a gel version gives color without adding too much extra liquid.
When you pull these ingredients together, you will see how little is required to make something that feels homemade and special. The simplicity is part of the charm. It allows the personality of your kitchen to come through, whether that means a family heirloom spoon or a cheerful mixing bowl you bought on a whim.
One practical note about the milk: whole milk gives the smoothest mouthfeel, but a lower-fat milk will work if that is what you have. If you want a dairy-free version, swap in a neutral unsweetened milk alternative and be prepared to adjust the powdered sugar to get the right thickness.
I like to use a shallow dish for mixing if I am making small batches for decorating. It makes spreading the icing a little easier, and when you are painting little details, that shallow pool helps you control the flow. For bulk coating, a medium-sized bowl is friendlier and lets you whisk without spilling.
Step-by-Step Directions
In a mixing bowl, combine powdered sugar, milk, and vanilla extract. Stir until the ingredients begin to come together, watching for any lumps to soften and dissolve. Take a breath and notice the gentle vanilla scent rising as the mixture blends into a pale, smooth paste.
Stir until smooth and well blended. Keep stirring until the surface looks glossy and a ribbon forms when you lift the spoon. If it feels too thick, add a drop more milk; if it seems too thin, fold in a touch more powdered sugar, spoon by spoon.
If desired, add food coloring to achieve the desired hue. Add it sparingly, a little at a time, and stir slowly so the color spreads evenly. Remember the shade will deepen a bit as the icing rests, so stop when it looks just a touch lighter than you want.
Use immediately to frost sugar cookies, allowing the icing to harden before storing. Spread or pipe with a calm hand and decorate with sprinkles if you like, then leave the tray undisturbed until the surface sets. Once the icing feels dry to the touch, you can stack or store the cookies in an airtight container.

Serving Classic Sugar Cookie Icing With Family Warmth
Serving these iced sugar cookies is part ritual and part small celebration. I often bring a tray to the table, the cookies arranged like a little village of colors and shapes, and watch as hands reach for them with eager ease. There is a kind of gentle rivalry among the kids for who gets the most colorful cookie, and that little game always makes everyone laugh.
We like to pair the cookies with coffee or a mug of warm milk, depending on the company. For grown-up guests, a pot of tea brings out the vanilla notes and makes the moment feel a bit like an old-fashioned tea time. For little ones, a small glass of cold milk seems to intensify the comfort. Presentation does not have to be perfect. A simple plate or a piece of parchment paper can be all the ceremony needed.
On special days, I make a small display where each person picks a cookie and adds their name with a dab of contrasting icing. It becomes a keepsake of sorts, a little edible place card that feels thoughtful and homemade. The cookies travel well to potlucks and school events, and I love how they seem to make new friends quickly, as if the icing helps start conversations between people who have never met.
When we host, I set aside a small bowl of extra glaze and a few spoons at the end of the table. It invites guests to dip or touch up their cookies the way one might add salt to a shared dish. It is a small way to make the experience collaborative. People leave with crumbs on their shirts and smiles in their eyes, and that feels like the whole point.
Storing Classic Sugar Cookie Icing for Tomorrow
If you have leftover glaze, storing it is kind and practical. Place the icing in an airtight container or a small jar and press a piece of plastic wrap directly on the surface to keep air from forming a skin. In the fridge, the icing will keep for a few days and the flavors will mellow into something rounder and softer. Bring it back toward room temperature before using and stir gently to revive the shine.
When you plan ahead, this icing can be made earlier in the day and still feel fresh for evening decorating. Let it sit covered at room temperature if you are going to use it within a few hours. For longer storage, refrigeration is the friendlier option. If the glaze thickens too much after chilling, let it warm a bit on the counter and add a teaspoon of milk to smooth it back to life.
Reheating is never necessary in a microwave. Simple, patient stirring is enough to bring the sugar and milk back together. If you care for the texture while stirring, you will find the glaze is forgiving and easy to coax back into a glossy, ready-to-spread state. This small ritual of reviving leftover icing has become one of those comforting tasks that feels like folding a blanket back around a warm loaf of bread.
Keep in mind that decorated cookies with this glaze are best kept in a single layer or separated by parchment paper when stacked. The icing sets to a sweet, delicate finish, so stacking too soon will smudge. After it has fully dried, you can stack with confidence and send a few in a tin to a friend without worry.
Tips from My Kitchen to Yours
Always sift powdered sugar if you want the smoothest result. It is a tiny step that makes a big difference in the way the glaze spreads and the way it looks on the cookie. If you skip it, and your sugar has lumps, those will show up in the finished coating and it just changes the mouthfeel.
Use a shallow bowl when you are mixing small batches. It gives you more control when adding color or adjusting thickness. A wooden spoon makes stirring feel homey, but a small whisk will beat out any remaining lumps more efficiently. Choose what feels right in your hands.
When adding color, start with less than you think you need. A little gel dye goes a long way and you can always add more. If you overdo it and the icing becomes too thin, bring it back with a touch more powdered sugar. These hands-on adjustments are where you learn the glaze and start to trust your instincts.
If you want to pipe simple lines or dots, use a small sandwich bag with the corner snipped or a piping bag fitted with a narrow tip. Practice on a sheet of parchment before working on your cookies. That little rehearsal will help you decide how much pressure to use and where to slow down. The icing is patient and forgiving, so take your time.
Store decorated cookies in a cool, dry place away from direct sunlight. If weather is warm and humid, a slightly cooler spot will keep the glaze from becoming tacky. A tin or a box with a tight lid helps preserve the scent and keeps the cookies tasting fresh the next day.
A Few Favorite Variations
If you like a lemony twist, add a teaspoon of fresh lemon juice in place of part of the milk and a touch of lemon zest. The glaze brightens and pairs beautifully with a plain, buttery cookie. It feels like sunshine on the tongue and is a lovely change for spring gatherings.
For a cozy spice hint, stir in a pinch of ground cinnamon or a dash of nutmeg. Those warm, familiar spices make the icing taste a little more like a hug. They are especially nice in colder months when you want your cookies to feel seasonal without being fussy.
If you are feeding a crowd and want an easier transport option, make the glaze slightly thicker so it sets firmer. It will be less glossy, but the cookies will travel better and still taste delightful. I do this when I know boxes will cross state lines or when cookies are part of a bake sale.
For a silky almond aroma, swap half of the vanilla for almond extract and reduce the amount slightly because almond extract can be strong. It gives a subtle, nutty note that pairs well with simple sprinkle decorations and makes the cookies feel a little more grown-up.
Final Thoughts on the Joy of Icing Cookies
There is a particular joy in watching a simple glaze transform a cookie into something that looks made with care. The act of spreading, the patient wait for it to set, and the moment when someone tastes a cookie for the first time are small, invaluable parts of home life. Those moments add up. They are the kind of memories that stay soft and warm in the mind.
The Classic Sugar Cookie Icing is not a showy recipe. It is honest, straightforward, and full of room for personal touch. That is what I love about it. It gives you a base to experiment and to make small choices that reflect your family and your table. Whether you are making a dozen or a hundred, the process is the same and it keeps the heart of home baking close.
If you are new to baking, this glaze will teach you patience in a gentle way and reward you quickly. If you have been baking for years, you will find the simplicity a welcome pause, a reminder that delicious things can come from very few ingredients. Either way, it is a recipe that invites conversation, tasting, and the kind of simple pleasure that makes a house feel like home.
Conclusion
If you would like a full cookie recipe to go with this icing, I often look at the Easy Sugar Cookie Recipe (With Icing!) for a reliable, kid-friendly dough that pairs beautifully. For a classic frosting technique and variations, this Sugar Cookie Icing Recipe | Your Homebased Mom offers clear steps and helpful tips that I return to sometimes. When I want a slightly different texture and piping ideas, I trust the guidance found at Sugar Cookie Icing – Preppy Kitchen for its practical instructions. For a straightforward, easy-to-follow icing tutorial that I share with friends, Easy Sugar Cookie Icing – Live Well Bake Often is a wonderful resource. And when I want to pair this glaze with one of the best sugar cookie doughs I know, I often refer to The Best Sugar Cookies (Recipe & Video) – Sally’s Baking Addiction for a dependable base that holds up under decorating.