The first time I baked these ham and cheese sliders, the whole house smelled like a warm lunch box and Sunday supper rolled into one, and my little one asked if the bread could sing because it smelled so good. I remember pulling the tray from the oven and watching steam curl up as the cheese stretched between two halves, and that stretch felt like a small family miracle. If you want something that reads like home in a single bite, these sliders do it — soft rolls, melting cheese, and a buttery poppy seed hug on top. For a light snack to bring to game night, I often pair them with something bright, like the zingy dip I read about when checking chips and salsa calories for a weekend treat at home, and it always rounds the meal.
Why Ham and Cheese Sliders Still Feels Like Home
There is a particular comfort in small things. These ham and cheese sliders have been part of our house for simple wins: rushed school mornings turned into cozy leftovers, last-minute potlucks where everyone reached for the same pan, and slow Sunday afternoons when we wanted a meal that didn’t ask for too much fuss. The recipe came to me from a neighbor who passed along tips about warming the rolls just right so they absorb the butter without turning soggy. I learned to watch for tiny golden edges and a smell that says, “sit down now,” and that memory shapes how I cook.
These sliders mean more than a tasty snack because they carry little rituals. We always break one apart together in the kitchen, letting the cheese stretch until someone laughs and then snaps a photo that will live for a moment. Those small moments are the heart of cooking with family. When my husband first tried them, he insisted on a second round, and now he has his own way of layering the ham so every bite hits the same note. The food becomes a way we talk and remember, and that makes simple things feel important.
I also love how these sliders are forgiving. You do not need a perfect ham, a perfect roll, or a perfect day. Swap in what you have, and the sliders will still hug your table. If you like a touch of sweetness, pick a softer roll. If you prefer a bit more tang, choose cheddar over Swiss. The idea is to invite hands and stories to the table, and in that way these sliders keep doing what good family food should do — bring people close.
Print
Ham and Cheese Sliders
- Total Time: 40 minutes
- Yield: 12 servings 1x
- Diet: None
Description
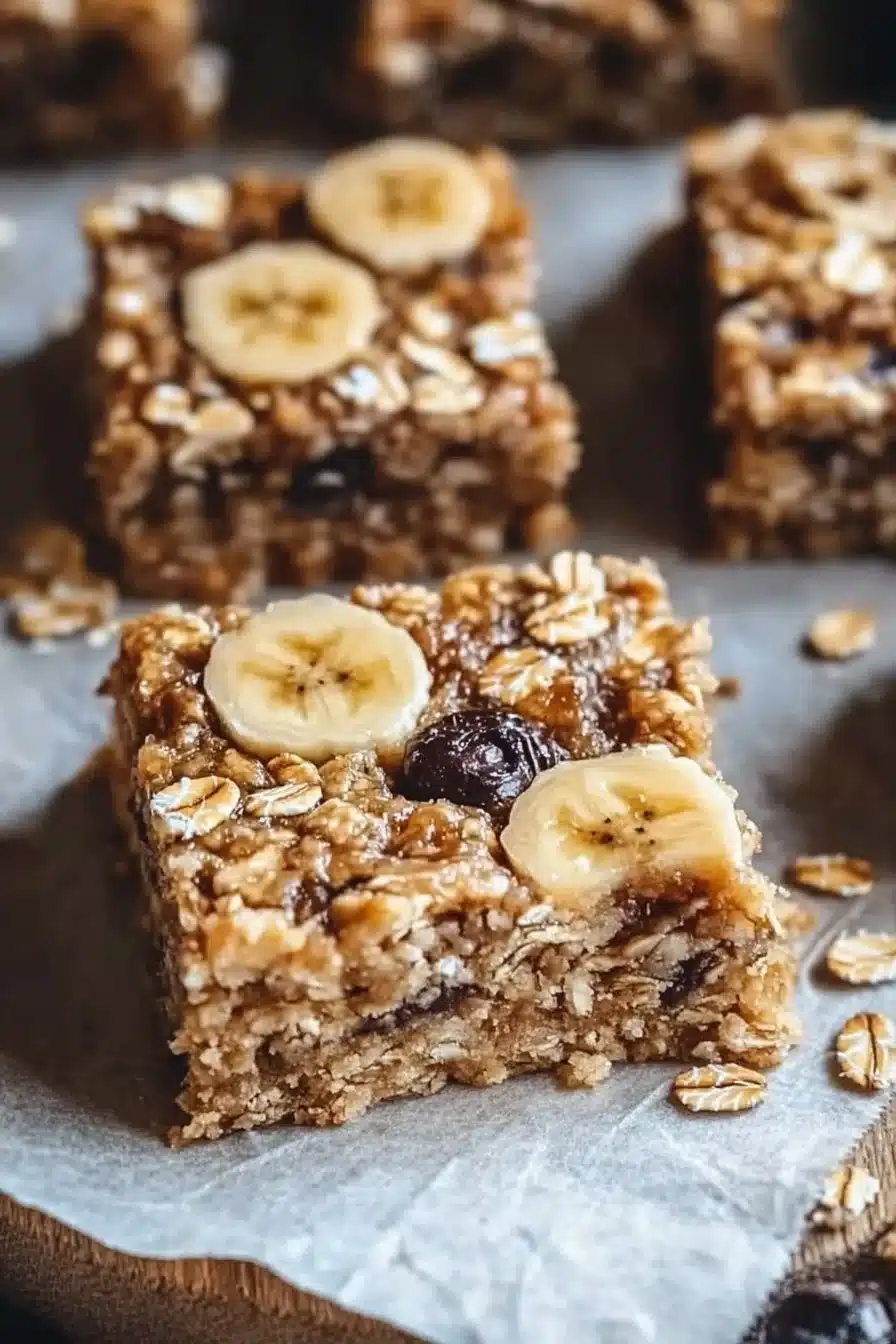
These ham and cheese sliders are a comforting, family-friendly snack featuring soft rolls, melting cheese, and a buttery poppy seed topping.
Ingredients
- 12 Hawaiian rolls
- 8 slices of ham, thinly sliced
- 8 slices of cheese (Swiss or cheddar)
- 1/2 cup butter, melted
- 2 tablespoons Dijon mustard
- 1 tablespoon poppy seeds
- Optional toppings (like turkey or vegetables)
Instructions
- Preheat the oven to 350°F (175°C).
- Slice the Hawaiian rolls in half without separating them.
- Mix the melted butter, Dijon mustard, and poppy seeds in a bowl.
- Place the bottom halves of the rolls in a baking dish.
- Layer the ham and cheese over the bottom halves.
- Place the top halves of the rolls on top.
- Brush the butter mixture over the top of the rolls.
- Cover the dish with foil and bake for 15 minutes.
- Remove the foil and bake for an additional 10 minutes, until golden brown.
- Serve warm and enjoy!
Notes
For a different flavor, feel free to swap in other cheeses or add toppings like spinach or roasted peppers. You can assemble sliders ahead of time for convenience.
- Prep Time: 15 minutes
- Cook Time: 25 minutes
- Category: Appetizer
- Method: Baking
- Cuisine: American
Nutrition
- Serving Size: 1 slider
- Calories: 300
- Sugar: 3g
- Sodium: 500mg
- Fat: 20g
- Saturated Fat: 12g
- Unsaturated Fat: 6g
- Trans Fat: 0g
- Carbohydrates: 28g
- Fiber: 1g
- Protein: 10g
- Cholesterol: 40mg
Bringing Ham and Cheese Sliders Together
“Every time I stir this pot, it smells just like Sunday at home.”
Making these sliders has a rhythm that feels like a small kitchen dance. You pull a pan from the cupboard, lay the rolls like little sleeping boats, and load them with thin ribbons of ham and cheese. The butter mixture takes a moment to come together, and as you brush it on, you listen to the soft crackle the oven will make when it meets heat. Count on the little details: the way melted butter bead on the bread, how the poppy seeds look like tiny stars on a buttery sea, and the way the top turns golden and slightly crisp while the inside stays pillowy and warm.
From there, the house fills with a scent that is part childhood and part welcome-home. The mustard gives a soft lift to the butter, and the poppy seeds add a textural surprise. It is a simple process, but it is one that rewards attention. Take your time brushing every seam. Let the cheese peek over the edges a little. Those are the signs that you are making something worth sharing.
If you like to plan a full spread, pair these with a crisp salad or pickles for contrast. For a cozy drink, a tart lemonade or a light iced tea keeps the plate from feeling too heavy and brings a fresh note to the table. I often think of how small shifts — a different cheese, a swish of honey in the butter — can make the sliders feel new again.
Ingredients You’ll Need
12 Hawaiian rolls — soft and sweet, perfect for that pillowy bite.
8 slices of ham — thinly sliced for even warming and easy layering.
8 slices of cheese (Swiss or cheddar) — Swiss gives a nutty pull; cheddar adds a sharp, familiar note.
1/2 cup butter, melted — use fresh butter for its richness and glossy finish.
2 tablespoons Dijon mustard — a little tang to cut through the richness.
1 tablespoon poppy seeds — they add texture and a gentle nuttiness on top.
Optional toppings (like turkey or additional vegetables) — try thin cucumber slices or a smear of chutney for a bright twist.
A warm side note: if you love a cozy aroma, add a tiny pinch of smoked paprika to the butter.
A warm side note: some mornings I brush the bottom roll with a little melted butter too, and it makes the first bite feel like buttered toast.
A warm side note: use fresh, cold butter if you can; it makes the topping shine.
A warm side note: feel free to tuck in a thin layer of spinach or roasted pepper for color and a little snap.
A warm side note: swapping Hawaiian rolls for dinner rolls or slider buns works in a pinch; I keep a roll of variations in mind for busy weeks or when I am trying to clear the freezer.
If you want to pair this with something sweet and fizzy for a casual gathering, I sometimes set out a batch of cold drinks inspired by a fun recipe I once bookmarked for a backyard day, and the two seem to live on the same friendly shelf of memory.
Step-by-Step Directions
Preheat the oven to 350°F (175°C).
Make sure the rack sits in the middle so the tops brown evenly. Give the oven time to come to temperature; a steady heat makes for even melting. You want the oven warm and patient, ready to turn butter into golden shine.Slice the Hawaiian rolls in half without separating them.
Use a long serrated knife for a clean cut through all the rolls at once. Hold the rolls steady with a towel if they try to wiggle, and let the knife do the work in a slow sawing motion. Keeping them attached helps them bake together and pull apart at the table.In a bowl, mix the melted butter, Dijon mustard, and poppy seeds.
Stir until glossy and smooth, and notice the mustard bloom into the butter. The poppy seeds will float like tiny dark dots in the mix, promising texture on top. Taste a dab and adjust the mustard if you like a bolder kick.Place the bottom halves of the rolls in a baking dish.
Fit them snugly so they warm together and hold their shape. There is comfort in arranging them like little sleeping homes in the pan; a full pan means everyone gets a piece of warm bread. Press them in gently so the layers will stay intact as they bake.Layer the ham and cheese over the bottom halves.
Lay the ham in even slices and tuck cheese on top so each slider has a ribbon of melty goodness. Try to keep the layers even so every bite tastes the same. If you are adding turkey or veggies, place them between ham and cheese so they heat just enough without drying.Place the top halves of the rolls on top.
Gently press down to close each slider and create a soft sandwich waiting to be brushed. This is the moment when everything comes together and the kitchen feels purposeful. Make sure the tops cover the filling so the butter can do its work on the crust.Brush the butter mixture over the top of the rolls.
Use a silicone brush and cover each seam, corner, and curve until the top gleams. The butter soaks in and the mustard lifts the flavor. Breathe in the scent that fills your kitchen and imagine the golden crust you will soon have.Cover the dish with foil and bake for 15 minutes.
The foil traps steam and helps the cheese melt without browning the top too quickly. Set a timer and resist peeking too soon; patience here gives a soft, warm center. You will see the tops rise and the cheese begin to melt under the cover.Remove the foil and bake for an additional 10 minutes, until golden brown.
Watch the edges and wait for them to turn golden and slightly crisp, and for the cheese to bubble at the seams. This is the moment the sliders announce they are ready, with a smell that makes you want to call everyone to the table. If your oven runs hot, check a few minutes early to avoid over-browning.Serve warm and enjoy!
Slide a spatula under a section and bring the pan to the table so everyone can pull apart warm pieces. Let the cheese cool for a breath or two so fingers do not get scalded, and then tuck in. The first bite will be soft, buttery, and full of that honest, simple flavor that makes a kitchen feel like home.

Serving Ham and Cheese Sliders With Family Warmth
When I bring these sliders to the table, I try to keep the setting simple and open. A cast-iron pan or a shallow baking dish makes a nice presentation because people can reach into the middle and pass plates around. I like to set out small bowls of pickles, coleslaw, or a quick slaw dressed with lemon and parsley for an acidic pop. Those bright notes cut the richness and keep the meal lively.
For a casual brunch, I might serve the sliders alongside a bowl of fresh fruit and a light green salad. For a game day or movie night, I put out crunchy chips, a creamy dip, and a platter of sliced veggies so there is a mix of textures. Sometimes we pair the sliders with a warm soup on cooler nights. The simple bread and cheese with a spoonful of soup feels like a hug.
I also have a soft tradition of letting everyone pick a tiny topping station. A small tray of mustard varieties, hot sauce, and sliced pickles lets each person customize their bite. It is a small way to invite people into the meal and make it theirs. If kids are at the table, a bowl of sliced grapes or carrot sticks helps keep things simple and familiar.
On nights when I want the table to look a little special, I tuck sprigs of herbs around the pan or set out a loaf knife for anyone who wants a more careful slice. The food never needs to be fancy. The point is to gather, to laugh, and to enjoy warm bread that brings a little comfort.
I often pair sliders with other easy treats from my kitchen archive, and sometimes I will pull inspiration from a playful recipe I saved for light drinks to match a sunny afternoon.
Little Variations That Make a Big Difference
There are ways to shift this slider into new moods without changing the method. Swap the ham for roasted turkey for a milder, leaner bite. Switch Swiss for sharp cheddar if you want a tangier melt. Add a thin swipe of honey mustard to the butter for a sweeter, more complex top. Each small change nudges the slider into a new place, and that makes the dish feel alive.
If you like smoky flavors, add a pinch of smoked paprika to the butter or use a ham that has been lightly smoked. For a fresher feel, tuck in thin apple slices or arugula between the meat and cheese. If you want to stretch the recipe into a fuller meal, add caramelized onions for depth and set the pan with a side of roasted potatoes.
For the home cook who likes to plan ahead, assemble the tray up to the point of brushing with butter, then cover and refrigerate for a few hours. When you are ready, brush and bake per the timing above. This trick helps on busy days when you want dinner to be ready quickly but still warm from the oven.
I also keep a small jar of poppy seeds in the cupboard because their subtle crunch brings a homemade touch to every batch. They are small, but they make the final, visible difference. Try them once and you will feel that the sliders are missing something without them.
How to Save the Leftovers
Pack the rest in an airtight container once the sliders cool to room temperature. The cheese will firm up as it cools, but refrigerated sliders reheat beautifully. I like to place a damp paper towel over the sliders before wrapping them gently to keep the bread from drying out. Stored this way, they will be good for two to three days.
When you are ready to enjoy them again, reheat in a 325°F oven covered for about 10 minutes, then uncover and heat until the tops get their butter-kissed color. This gentle reheating brings back the oozy cheese and soft bread without turning the roll into a rock. If you are in a hurry, a quick microwave zap will warm them, but it can make the bread a little softer than the oven method.
If you prefer to repurpose leftovers, slice the sliders and crisp them in a skillet like little grilled sandwiches. Add a touch of butter in the pan and press them down until the cheese melts and the edges get golden. It is a small upgrade that makes the leftovers feel intentionally planned.
I keep a short list of storage tricks for friends who call me in a panic about too many leftovers, and one favorite is to freeze individual sliders wrapped in foil for up to a month. Thaw them overnight in the fridge and reheat gently the next day until they are warm through. This saves the joy of a warm bite on a rushed evening.
Before I forget, here is a gentle reminder: if you like a softer top when reheating, tent the pan with foil. If you want a crisper top, leave it uncovered for the last few minutes.
Kid-Friendly and Crowd-Pleasing Tips
Kids often love these sliders because they are small and easy to hold. To make them extra kid-friendly, cut the cheese into smaller pieces so little mouths can manage the bite. Serve them with a tiny cup of applesauce or a small pile of grapes for a balanced plate. Letting children help press the tops on the rolls or sprinkle poppy seeds gives them a small job and a big sense of pride.
For bigger crowds, double up the recipe and use a half-sheet pan lined with parchment so you can pull a piece without crowding. Keep extra napkins nearby; warm cheese and tiny hands do tend to get messy in the most delightful way. If you have picky eaters, set aside a plain pan with just cheese and cooked ham and another with simple turkey so everyone can find a version they love.
I once made a batch where each row was a different flavor: one row classic, one row with a smear of pesto, one row with caramelized onions. It turned a standard tray into a buffet of happy surprises, and guests loved trying each version.
Teach kids to check the cheese pull before eating; it is a small safety habit that keeps dinner calm. Encourage them to use a plate and to share stories about their day while they eat. That is the real secret to making sliders feel special at home.
Tools and Pantry Staples That Help
A serrated knife is your kitchen friend for slicing the rolls. A silicone brush makes it easy to get the butter into every crevice. Use a shallow baking dish or small sheet pan to hold the rolls snugly so they can warm each other and stay soft. A bowl for mixing the butter and a small spoon for tasting are useful too.
Keep Dijon mustard and poppy seeds in your pantry if you plan to make sliders often. Butter should be fresh and cold before melting for the smoothest texture. If you are trying to clear out a deli ham, this recipe welcomes that kind of thrift with open arms. A tight-fitting foil will make the cheese melt without collapsing the tops.
I always keep a roll of parchment in the drawer. It makes cleanup easy and keeps the pan looking presentable when I take it straight to the table. Little tools like that help the cooking feel calm and achievable.
Troubleshooting the Little Things
If your rolls come out soggy, it often means the pan was covered for too long or the filling was too damp. Try to keep the fillings at room temperature and bake uncovered for a few extra minutes at the end. If the tops brown too quickly, lower the oven by 25 degrees and extend the time slightly.
If the cheese does not melt evenly, check the placement on the rack and make sure the oven heats evenly. Thin slices of cheese will melt faster, so choose the thickness to match your timing. If the butter pools in places and leaves some spots dry, brush a second time before baking to even things out.
If the sliders dry out when reheated in the microwave, try a damp paper towel over the pan to keep moisture in. If the poppy seeds fall off, press them into the butter with your fingers before baking so they adhere better. These small fixes help save a tray and keep the meal feeling cared for.
A Note on Feeding a Crowd
If you plan to feed a crowd, assemble sliders in more than one pan so guests can pull from several spots. Keep extras warm on a low oven setting to replenish the table. For parties, arrange one pan as a kid-friendly version and another with bolder flavors for adults. Label the pans so people know which will give them the flavor they prefer.
Set up a small station with tongs, napkins, and small plates so the room can move without a bottleneck. A tray of sides like coleslaw, pickles, and a simple salad keeps things moving and offers contrast to the rich sliders. People will thank you for the variety and for the easy reach-and-serve format.
If you expect leftovers, have a stack of small containers nearby and invite guests to take a sandwich home. It is a warm, practical way to share food and cut down on waste.
Keeping the Habit of Cozy Cooking
I come back to this recipe because it is one of those steady companions that fits a hundred small moments. It doesn’t demand a day in the kitchen, and it rewards attention with a golden top and a cheesy pull. When I make these sliders, I feel connected to the people I cook for and to the small kitchen rituals that keep life gentle.
If you are learning to cook for a family or refining small skills, this recipe offers practice with simple but important moves: layering, brushing, warming. It teaches you to watch for color and to listen for the oven’s little signals. Those small lessons ripple outward into the rest of your cooking life.
I hope this recipe becomes part of your own simple rituals, whether for a quiet night or a lively gathering. It is the kind of food that makes everyday life a little more comforting.
How to Save the Leftovers
If you have any leftover sliders, here is a gentle plan to help them stay delicious. Cool the sliders for a few minutes, then wrap in foil or place in an airtight container. Put a piece of parchment between layers if you need to stack them, and refrigerate for up to three days. The flavors settle and deepen, making the next day’s bite feel mellow and familiar.
When you reheat, give them a short time in the oven to bring back the soft center and melty cheese. If you are reheating just one or two, a skillet method gives them a fresh, crisp edge and a warm center. Freeze extra sliders wrapped well for up to a month, then thaw in the fridge before warming gently.
If you like to plan meals, I often rework leftover sliders into a quick skillet dinner with sliced tomatoes and greens. It keeps the food feeling like a new meal instead of just a repeat. And calling a friend with a spare slider is a small, thoughtful way to share a bit of comfort.
To keep things bright and fresh, pair reheated sliders with a crisp salad or fresh fruit to cut the richness and restore balance. A little acid goes a long way, and that pairing always feels kind to the palate.
Conclusion
If you want a tried-and-true version to compare technique and timing, I sometimes consult a clear step-by-step from a trusted source like Ham and Cheese Sliders Recipe (Oven-Baked and Easy) | The Kitchn for method reminders. For a version that leans into simple joy and approachable flavors, I find inspiration in a friendly write-up such as Ham and Cheese Sliders – Simple Joy. When I am looking for a rich buttered topping idea and tips on assembly for gatherings, a recipe with practical party advice like Easy Hot Ham and Cheese Sliders – My Baking Addiction is helpful. For variations and crowd-sized pans that feed a group, a reliable family-tested method appears in a classic recipe at Baked Ham and Cheese Sliders Recipe – Allrecipes. And when I want to see playful twists and easy swaps, a blog with fun ideas like Ham and Cheese Sliders – Cravings of a Lunatic gives me small, creative nudges.
Finally, remember this: the best slider is the one you make with care and share without fuss. Keep a little butter close at hand, listen for the oven’s golden whisper, and let whoever is hungry come to the table.