There was a moment one late Saturday morning when the house smelled like warm butter and sugar, and my little one pressed her nose to the oven door like it was a magic window. The sound of spoons tapping the mixing bowl, the soft flake of flour landing on the counter, and the hush that fell when the timer clicked off are the kind of small, bright moments I keep. Sugar Cookie Cups have become our go-to for those mornings when I want the kitchen to feel like a hug.
Why Sugar Cookie Cups Still Feels Like Home
The first time I made these, I was trying to bring a little party to a quiet afternoon. I wanted something that looked playful and tasted like the sugar cookies my grandma made, but I wanted a shape that felt new. Rolling the dough into little cups and filling them with cream cheese frosting felt like giving a familiar friend a new coat of paint.
Those cups are an easy thing to share, whether we pass them around at a school bake sale or tuck them into lunch boxes for a surprise. They carry the same soft, buttery bite as a classic sugar cookie, but with a little cream and color on top, they read like celebration. Making them always reminds me that small changes in the kitchen can make ordinary days feel special.
I love that these are forgiving for a beginner and still fun for someone who cooks every day. If you like trying different cookie forms, you might also enjoy a different twist on childhood flavors like the chewy honey sesame cookies I turn to when I want a nutty note in my baking.
The Story Behind Our Favorite Sugar Cookie Cups
In our home, recipes often arrive through a story. These cups began as an experiment after a rainy picnic that turned into an indoor tea party. I wanted something that could sit on a plate and still feel like something extra. My kids wanted frosting, my husband wanted something they could hold without melting, and I wanted something that smelled like Sunday.
I remember making a batch and taking one outside to the porch. The light was soft, and the breeze carried the sugars and butter right to the open window. My neighbor waved, and I shared a tray. She told me she used to make sugar cookies with her mother, and we traded tiny kitchen memories right there by the mailboxes. Food does that; it opens the door to story.
When you make Sugar Cookie Cups, you share more than a treat. You share a moment that’s easy to repeat. Over time I learned small tricks that make the texture exactly what I love: soft in the middle with a slight golden edge. If you enjoy different takes on familiar cookies, try the cheerful spin on s’mores we sometimes pull out when friends come over like this s’mores girl scout cookies idea.
Bringing Sugar Cookie Cups Together
“Every time I stir this pot, it smells just like Sunday at home.”
There’s a rhythm to making these that I find quietly soothing. You start with soft butter and sugar, and you cream them until the mix looks lighter and a little fluffy. The bowl hums while you beat in an egg and vanilla, and the dough comes together like a promise. When you press the balls into muffin cups, listen for the tiny thuds as they settle.
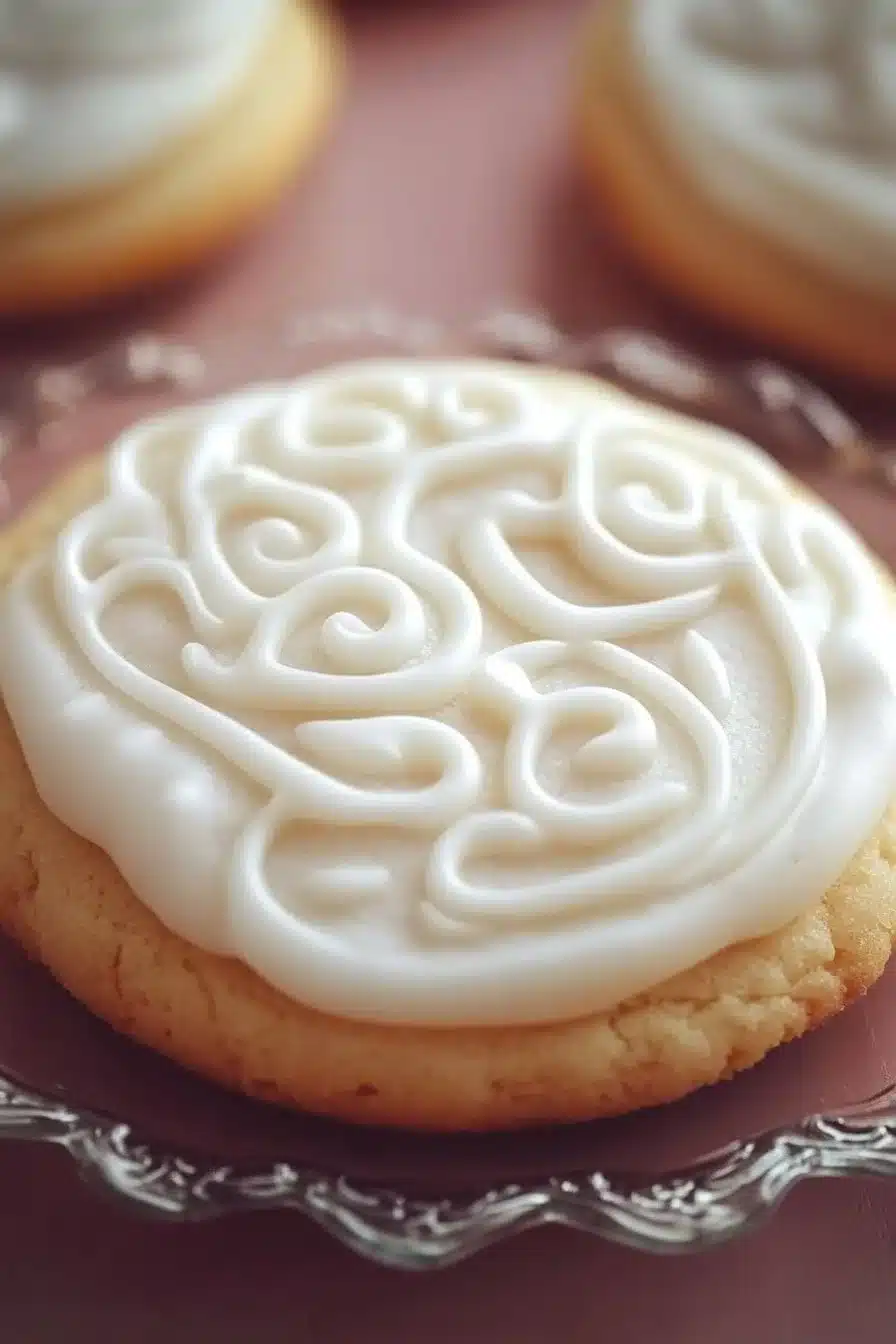
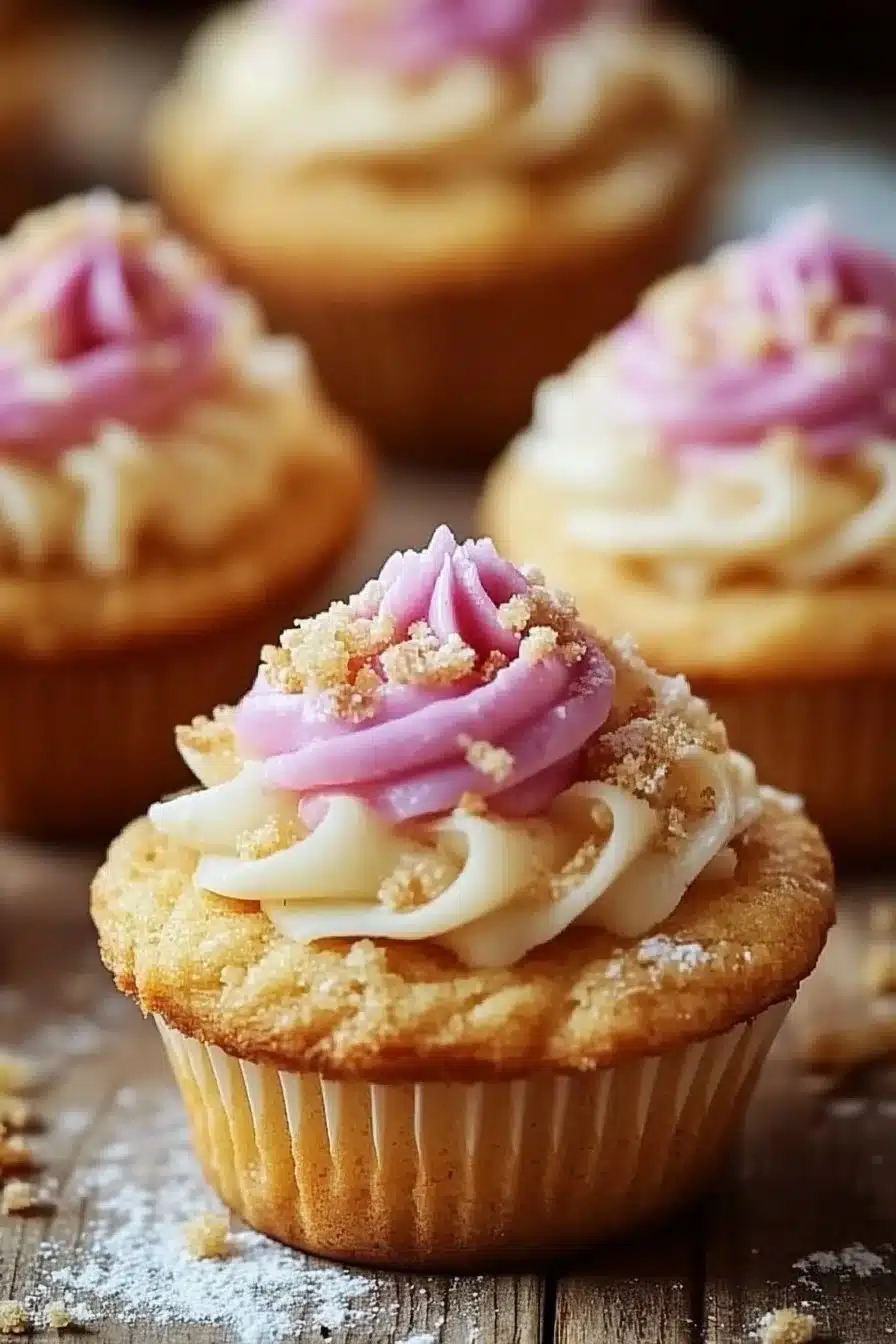
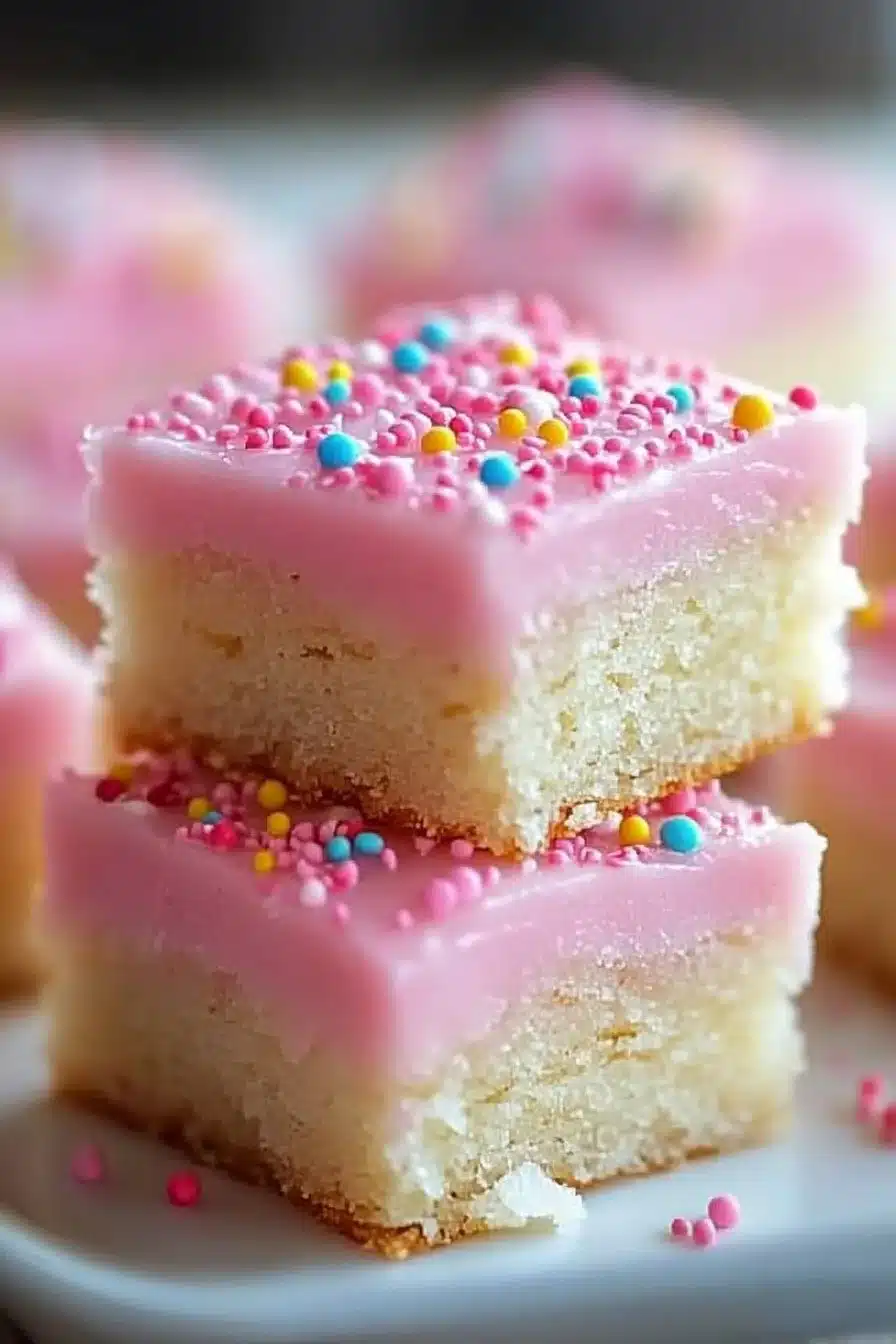
Colors matter here. The dough will be pale and warm, and when the edges begin to turn a soft gold, you know they are close. While they bake, the kitchen fills with a sweet, toasty scent that always makes my kids come wandering back to the oven. Once cooled, the glossy cream cheese frosting sits like a small crown in each cup. I often let a child choose the sprinkles because it becomes part of the story we are making together.
If you like pairing cookies with seasonal flavors, these cups are a good blank canvas. For richer holiday notes, we sometimes think about eggnog or spice, and I keep other favorite cookies in mind when I plan a full dessert table. A comforting recipe I turn to in winter is the soft frosted eggnog cookies, which pair well with a warm drink while these sugar cookie cups cool.
Ingredients You’ll Need
1 cup unsalted butter, softened
1 cup granulated sugar
1 egg
1 teaspoon vanilla extract (a little extra vanilla if you love a cozy aroma)
2 3/4 cups all-purpose flour
1 teaspoon baking soda
1/2 teaspoon salt
Cream Cheese Frosting (store-bought or homemade)
Sprinkles (optional)
Fresh butter gives this its richness. I polish the butter off the counter into the bowl with a wooden spoon and it feels like the first kind word you give to the dough.
I like to have the frosting at room temperature so it spreads without cracking. If you make your own frosting, keep it smooth and slightly tangy so it balances the sweetness. Store-bought works fine when life is busy, and my kids happily do the decorating.
If you are gathering ingredients for a bake day, set the egg out ahead of time to warm slightly for an easier mix. Measuring flour by spooning into the cup then leveling is a small step that keeps the cups tender and not dense. And if you want a soft lemon note, adding a teaspoon of lemon zest to the dough is a bright idea I reach for on sunny afternoons.
Step-by-Step Directions
Preheat the oven to 350°F (175°C).
Grease a muffin tin well or line it with papers for easy removal. Heat the kitchen and let the smells do their work while you assemble your tools.In a large bowl, cream together the softened butter and sugar until light and fluffy.
Beat with a hand mixer or stand mixer and stop when the mix looks pale and a little billowy. Stir until glossy and you can almost see the sugar dissolve into the butter.Beat in the egg and vanilla extract.
Mix until the egg is fully incorporated and the batter calms down into a smoother texture. Breathe in the sweet, warm aroma and smile at how simple this feels.In another bowl, whisk together the flour, baking soda, and salt. Gradually add dry ingredients to the wet mixture until combined.
Use a spatula to fold the flour in gently so the dough stays tender. Work until there are no dry streaks and the dough clings together in a soft mass.Roll the dough into balls and place them in a greased muffin tin, pressing them down slightly to form cups.
Press with your thumb or the back of a spoon to hollow a shallow cup in each ball. Keep them a little taller in the center so the frosting has a place to sit.Bake for 10-12 minutes, or until edges are golden.
Watch for the gentle browning at the rim and resist the urge to overbake. The centers should still look soft; they will set as they cool.Let the cookie cups cool completely before filling them with Cream Cheese Frosting.
Cooling gives the cups a chance to firm up so the frosting does not melt away. This is a good moment to make coffee and tidy up the counter.Add sprinkles on top and serve.
Let each person finish one in their own way, bright with colorful sprinkles or left plain and elegant. Then share them warm or at room temperature and savor the small, sweet bites.

Bringing Sugar Cookie Cups to the Table
Sugar Cookie Cups are playful and portable. I love placing them on a simple white plate so the colors of the frosting and sprinkles stand out. Sometimes we line them up like tiny soldiers on a wooden board for guests, and other times we tuck them into paper liners for a picnic.
When we serve these at family gatherings, I let kids pick a cup and add their own extra sprinkles. It becomes a quick game of who makes the prettiest one. For a tea or coffee hour, a small dish of fresh berries makes a bright side that cuts the sweetness and adds freshness.
For quieter nights, one cup with a small scoop of vanilla ice cream feels like a cozy reward. If you are bringing these to a potluck, pack the frosting separately and fill them on site for the best look. We sometimes add a tiny mint leaf for a homey touch that makes people smile.
I often think about how other cookie recipes travel to the table and borrow ideas. If you want a chewy, rustic option for a mixed cookie tray, consider the vegan oatmeal cookies as a companion to these cups.
Storing Sugar Cookie Cups for Tomorrow
Treat leftovers with a little care so they stay soft and lovely. Store the cookie cups in an airtight container at room temperature for up to two days. If your kitchen is warm, keep them in the fridge, but know the frosting will firm up; let them come back to room temperature before serving for the best texture.
If you plan to save them for longer, freeze the baked and cooled cups without frosting. Place them on a tray in the freezer until firm, then transfer to a freezer bag for up to three months. When you are ready, thaw them at room temperature and add fresh frosting before serving. The cookie itself keeps its soft crumb when frozen this way.
If you have frosted more than you can eat, store the filled cups in a single layer on a baking sheet in the fridge for up to three days. Bring them to room temperature before offering them at the table; their flavors will open up and the frosting will lose any chill.
A gentle rule I share with friends is to add fresh sprinkles just before serving. They can pick up moisture over time and lose their shine, so pop them on last to keep the cups looking bright.
Tips, Tricks, and Little Variations
The dough is forgiving, but a few small habits make a big difference. Use room temperature butter so it creams quickly with the sugar; that gives you an airy dough that bakes evenly. Measure flour carefully and avoid packing it into the cup to keep the cookies tender.
If you like a hint of lemon or orange, add a teaspoon of zest to the wet mix. A splash of almond extract can be lovely too, but it is strong, so use just a couple of drops. For a softer cup, press the dough a little deeper into the center before baking.
Swapping the frosting keeps these fresh over time. Try a thin layer of lemon curd under the cream cheese frosting for a bright pop. Or fill the cups with a spoonful of jam and top with a small dollop of frosting for a jammy surprise. When I want something less sweet, I mix plain Greek yogurt with a bit of honey and a touch of vanilla, then spoon that on top.
For texture, add chopped toasted nuts to the frosting or sprinkle finely chopped toasted coconut on top. My kids love a version with rainbow sprinkles and a few mini chocolate chips tucked in the frosting. Keep experimenting and let the kids be part of that process.
If you are making these for a holiday, color the frosting to match the season and try themed sprinkles. For spring, I dye the frosting a soft pastel and let the kids scatter tiny sugar flowers on top.
Common Questions from the Kitchen
Q: Can I make the dough ahead?
A: Yes. You can make the dough and wrap it tightly in plastic in the fridge for up to two days. Bring it to room temperature slightly so it is easy to roll into balls. If you chill the dough longer, let it soften a bit before shaping.
Q: Why did my cups spread too much?
A: Check that your flour was measured correctly and that you chilled the dough if your kitchen is warm. Also make sure your muffin tin is well greased so the edges do not stick and pull the shape outward.
Q: Can I use salted butter?
A: You can, but reduce added salt slightly. Salted butter adds a different note and can make the cups taste more savory-sweet. I prefer unsalted because it allows me to control the salt level.
Q: How do I keep the centers from collapsing?
A: Press the indentation gently and avoid making it too deep before baking. Also bake just until the edges color and don’t overbake the cups. Cooling on a rack helps them set without losing shape.
Q: Can I add mix-ins to the dough?
A: Yes, but keep them small. Mini chocolate chips or finely chopped nuts work well. Too much could change the texture and make the cups stiffer.
Equipment and Little Habits That Help
A good muffin tin is worth keeping clean and scratch-free. Greasing it well with a little butter or nonstick spray keeps the cups intact. If you prefer an even shape, use papers and then press them gently to form the cup; the cups will hold a softer edge.
A hand mixer or stand mixer saves a lot of elbow grease, but a brisk hand with a wooden spoon works fine. Use a small cookie scoop for even balls so the cups bake at the same speed. A small offset spatula or butter knife smooths frosting quickly and leaves the tops neat.
I like to have a small plate for sprinkles and let kids dip each cup right at the table. It turns clean-up into a moment of joy. Keep a damp cloth nearby for flour dust and a small bowl for scraps of dough the kids want to taste. Those tiny bites are part of the memory making.
A Note on Flavor and Texture
Sugar Cookie Cups are simple and honest. The dough should be tender and melt in your mouth, with the edges offering a soft chew. The frosting brings a tang that balances the sugar, and the sprinkles add a playful crunch. When I bite into one, I look for a soft center that gives way with a light pull and a frosting that is a little cool against my tongue.
If you prefer a crisper cookie, bake them a minute or two longer and watch for deeper color at the edge. If you want the centers very soft, err on the side of less baking and let them finish setting while they cool. Texture is personal, and part of the fun is making the cups exactly how your family likes them.
Bringing Children Into the Kitchen
This is a recipe I make with littles all the time. Rolling dough into balls is a simple task they can do, and pressing the cups is a safe way for them to help shape the cookies. Let them spoon frosting on top and choose a pattern of sprinkles. Their pride in a finished tray is contagious.
Use small tasks to teach gentle kitchen skills: measuring sugar, cracking eggs into a small bowl, or stirring the flour in slowly. Keep a damp paper towel handy to wipe sticky hands and a low chair nearby so they can reach. The goal is to build confidence, not perfection.
If you want a homemade frosting that is easy for kids to spread, make a softer cream cheese frosting with a touch more milk so it is gentle under little hands. They will smear it with joy and you will get stories for the table.
Why These Cups Keep Coming Back
There is comfort in a recipe that is both quick and full of heart. Sugar Cookie Cups are simple enough to make on a weekday after school, and pretty enough for a family celebration. They carry a bit of nostalgia while letting you play with color and texture.
Every time these go into the oven, the house fills with a smell that slows everyone down a little. That pause is where family happens. We sit at the counter, share small bites, and tell one another about the day. The cups become a way to stop and listen, and they make routines feel like rituals.
If you like trying seasonal spins or want more cookie ideas to pair with these cups, I often keep a roster of favorites close by. A cozy hint of spice or a chocolate chip friend can make a simple tray feel like a feast.
Conclusion
When you want a recipe that brings a little shine to a regular day, these Sugar Cookie Cups answer the call. They teach patience in small steps, give children room to help, and hand you a tray that looks like a small celebration. If you enjoy exploring different fillings and ideas, this version is a kind base to play from. Link up a few ideas from other kitchens when you need inspiration, like a fruity cheesecake twist from Fruit Cheesecake Sugar Cookie Cups that layers fresh berries and cream. For a seasonal craft that turns baking into a family tradition, see the joyful take on decorating in Easter Basket Sugar Cookie Cups – Together as Family. If you want a classic step-by-step from another home cook who loves a hands-on kitchen, visit the friendly guide at Sugar Cookie Cups – Dance Around the Kitchen. For a pastel, holiday-inspired version full of springtime ideas, check out this playful recipe at Easter Sugar Cookie Cups – Fake Ginger. And if you need a cheesecake-forward take for a special occasion, find a lovely riff in Cheesecake Sugar Cookie Cups – Like Mother, Like Daughter that pairs well with a slow afternoon and a cup of tea.
If you try these, bring me back a story. I want to know which frosting you loved and how a little sprinkle gave your day a spark. These are the small things that make a kitchen feel like home.